
The Silverdaw Window
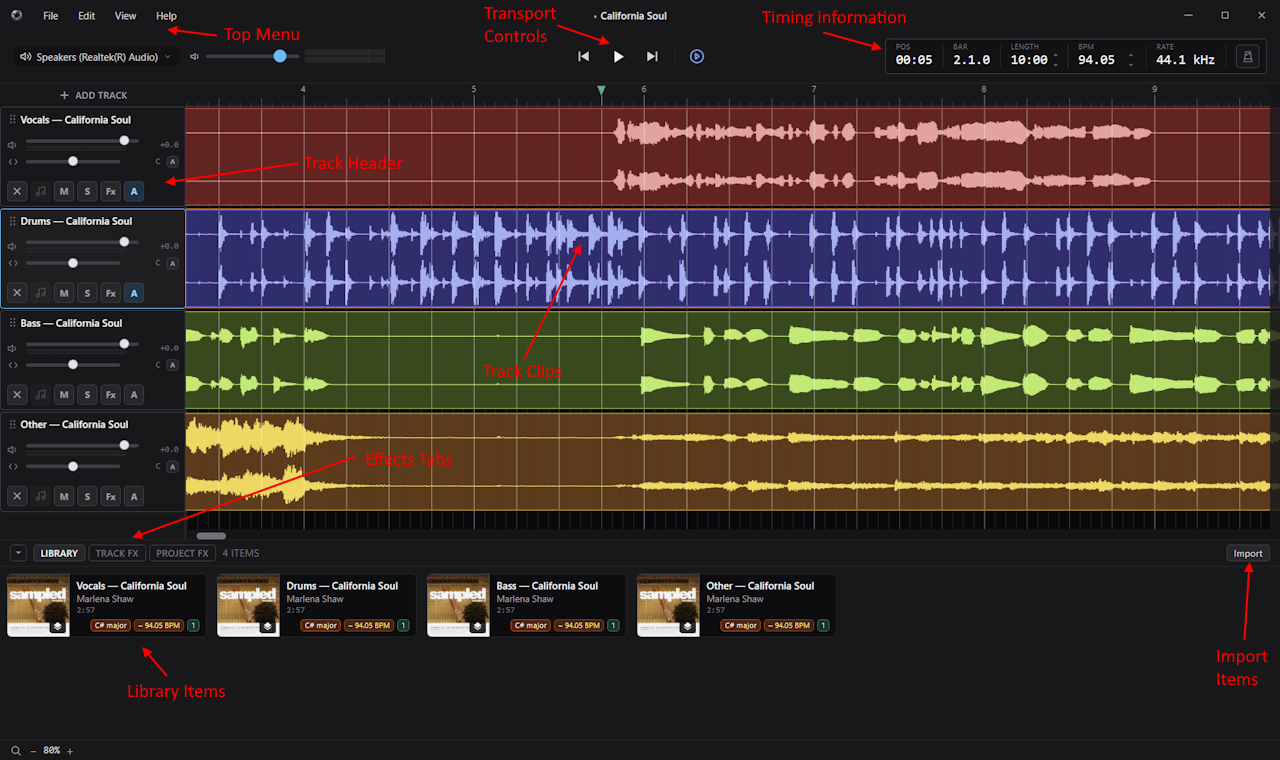
This page is a quick tour of the main parts of the Silverdaw window, so you know where everything lives before you start building a mix.
The menu bar
Along the top you'll find the main menus:
- File — create, open, and save projects; set project properties; import audio to the Library or assets from another project; add a track; and export your finished mix.
- Edit — undo and redo; cut, copy, and paste; split, duplicate, and delete clips; trim the project to the last clip; clear all markers; and open Preferences….
- View — zoom the timeline in and out, jump to zoom presets, show or hide the Library / FX panel, and toggle full screen.
- Help — open the Documentation and the Keyboard Shortcuts reference, Submit Feedback, and see version information in About Silverdaw.
The Submit Feedback item opens Silverdaw's feedback site (powered by Featurebase) in your browser, where you can suggest features, vote on ideas, and report problems.
The transport
The transport controls handle playback. You can start and stop with the play button or the space bar, and skip through your project with the previous and next buttons. By default those buttons step through your markers; you can set them to jump to the start and end of the project in Preferences ▸ Timeline. A Follow playback toggle decides whether the timeline scrolls to keep up with the playhead or stays still while you play.
When you have a timeline range, the play button becomes Play Selection. The Loop Selection button beside the transport repeats that range until you turn it off or clear the range.
The timing display shows your position in the project and the project's BPM, which you can change at any time — your arrangement is retimed to stay in time. See Changing the project tempo. It also includes a Metronome click you can switch on to hear a tick in time with the project tempo. See the metronome for more.
The timeline
The timeline is the large central area where you arrange your music. Audio appears here as clips laid out on horizontal tracks, measured against a bar-and-beat grid running left to right. Its ruler also shows minutes and seconds at every zoom level. This is where you move, split, trim, and rearrange your material — see Arranging the Timeline.
The status bar
A thin strip along the very bottom of the window holds two timeline controls:
- A zoom control (magnifying-glass icon) with − and + buttons either side of the current zoom percentage. Double-click the percentage to type an exact zoom level.
- A grid control (grid icon) that sets how coarse the timeline grid is: Bar, Beat, Half beat, Quarter beat, or Free. This is the interval that clips, markers, the playhead, and ranges snap to, and it is saved with your project. See Choosing the grid.
Track headers
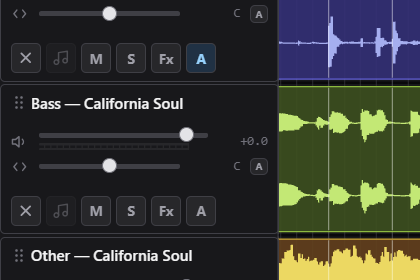
Each track has a header on the left with its controls:
- A volume fader.
- A Pan control (just under the fader) to place the track left or right.
- Mute and Solo buttons — mute silences a track; solo plays only the soloed track(s).
- An Import button to bring an audio file straight onto that track (available while the track is empty) — a quick alternative to dragging from the Library.
- A Remove track button to delete the track.
- A track effects toggle that shows or hides the Track FX for that track.
- An automation toggle that shows or hides the track's automation lanes, where you draw curves that change settings over time.
Single-click a track's name to rename it in place.
Drag the edge of a track header to resize it, and drag headers to reorder tracks. Headers stop shrinking at the point where their own buttons would start to squash, so the controls always stay usable. The overall level of your mix is shown by the master output meter.
The bottom panel
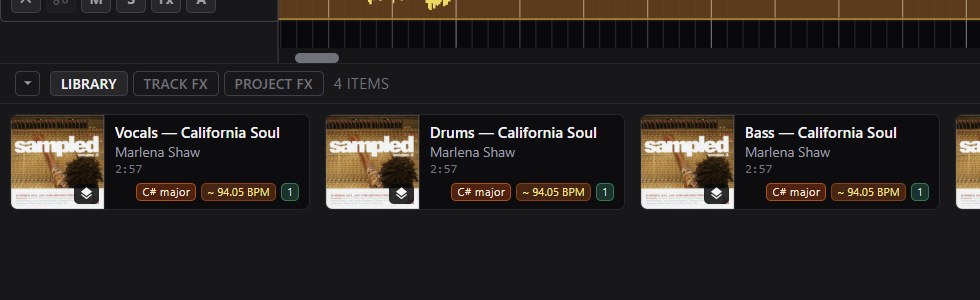
The panel across the bottom has four tabs:
- Files — browse folders of audio on your drives, listen to a track, and import it. See Browsing Files.
- Library — the audio imported into this project, ready to drag onto the timeline. See Importing & the Library.
- Track FX — the effects for the selected track. See Mixing & Effects.
- Project FX — the shared Reverb, Delay, and Glue Compressor, plus the Safety Limiter for the final output.
You can collapse the panel when you need more room for the timeline, and expand it again when you need it — from the panel's header, with Ctrl+J, or View ▸ Toggle Library / FX Panel.
Choosing your audio output
Silverdaw plays through your chosen audio output device, and you can switch devices at any time without leaving the timeline. If you press play and hear nothing, this is the first thing to check.
You can set the output in Edit ▸ Preferences ▸ Audio, and a project can also remember its own device in Project Properties. Choosing Use Application Settings for a project clears its override, so the device from Preferences is used instead.
If a device tends to go to sleep and clip the start of playback (common with some USB audio devices), turn on its Keep awake checkbox in Preferences ▸ Audio.
Use the output button in the transport to switch devices for the current project. Choose Rescan devices after connecting new hardware. If a project's saved device is unavailable, Saved Audio Device Not Available explains that playback continues through the default device while the saved preference remains unchanged.
The Clip Editor
Double-click a clip (or right-click it and choose Open ▸ Clip Editor) to open the Clip Editor, a focused window for detailed work on a single clip: matching tempo, shifting pitch, slicing into loops, shaping volume, and more. See Editing Clips.